(1) "How To Recover Deleted Files",
(2) "Will a Data Recovery Program Undelete Anything Ever Deleted?",
(3) "How Long is Too Long Before a File is Unrecoverable?", and
(4) "Why Are Some Deleted Files Not 100% Recoverable?".
Once you've read these guys, check out Tim's "19 Free Data Recovery Software Tools" survey.
Interestingly, CTB-Locker does not encrypt the original target files but rather copies thereof.
It’s important to know that CTB Locker creates copies of your files and encrypts them. In the meanwhile, the original files get deleted. There are applications out there that can restore the removed data. ... The newest version of the ransomware under consideration tends to apply secure deletion with several overwrites, but in any case this method is worth a try.Consequently, a number of the ctb-locker decrypt search pages suggest that a file recovery tool may be able to recover the original target files. The "Some ideas to restore files encrypted by CTB Locker" article from which I quoted last time recommends the Recuva program in this regard. Recuva has both a free version and a "professional" version for $24.95, and the former has pride of place in the aforecited "19 Free Data Recovery Software Tools" survey. Sounds good, let's do this, shall we? So, I go to this download page and download the rcsetup152.exe installer executable and then run the installer to install Recuva.
- "CTB Locker removal: how to decrypt files encrypted by CTB Locker virus"
Recuva comes to us courtesy of Piriform, the same folks who make the CCleaner unnecessary file remover. Piriform maintains help documentation for Recuva here; it's not necessary to read this material to use Recuva, although doing so will give you a more complete (but not completely complete) view of the program.
Recuva run
Recuva has two modes of operation: a "wizard mode" and an "advanced mode". With respect to searching a computer for deleted files, I find that the advanced mode does not in practice do anything that can't be done with the wizard mode, although the former does provide an interface via which search results can be parsed in a value-added way, as we'll see below. When first launched, Recuva starts in the wizard mode.
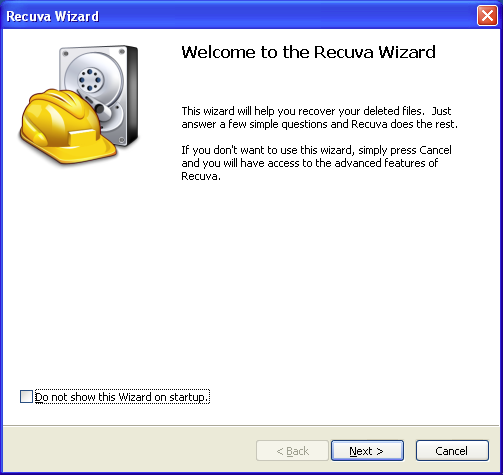
We can go straight to the advanced mode by clicking the window's button, but let's stay in the wizard mode for the time being. Clicking the button takes us to a second window with a menu of files types that we may want to recover.
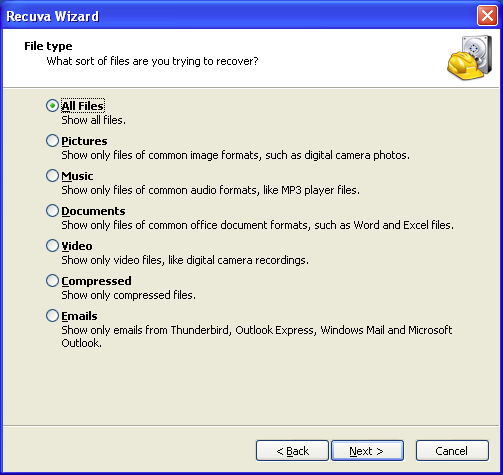
The menu's All Files radio button is checked by default; I'd stick with this option as its search results can be easily 'filtered' for specific file types in the advanced mode. Clicking the window's button takes us to a third window with a menu of locations where the files of interest may have been prior to their deletion.
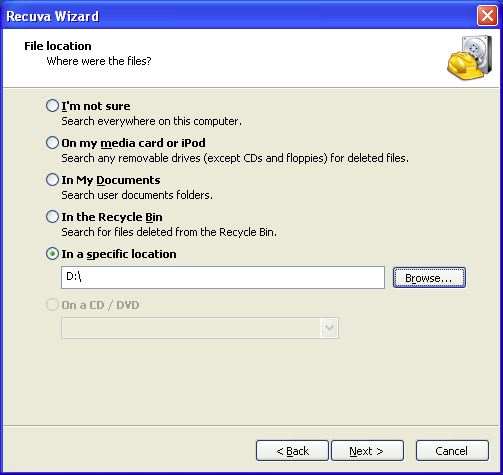
We will target the Recovery (D:) volume in our quest to recover the .wps, .jpg, and .pdf My Documents\ data. Accordingly, we check the menu's In a specific location radio button and enter D:\ into the text input below the radio button label by either
(a) clicking the button and navigating to the Recovery (D:) location in the Browse For Folder window that pops up
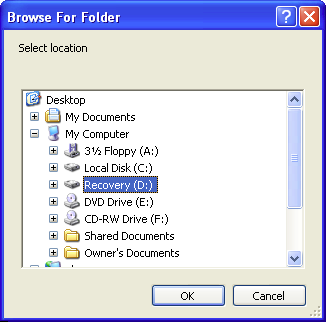
and then clicking the button or just
(b) manually typing D:\ in the input.
The D:\ volume gives us a much better shot at recovering our data than does the Local Disk (C:) volume because cleaning up the computer entailed some 'write-heavy activity' - specifically, several software installs - in the latter, and there's a pretty good likelihood that some of the data has been overwritten by that activity: see the Stop using your computer! subsection of the aforecited "How To Recover Deleted Files" article.
Clicking the File location window's button takes us to a Thank you, Recuva is now ready to search for your files window in which we can elect to carry out a "deep scan".
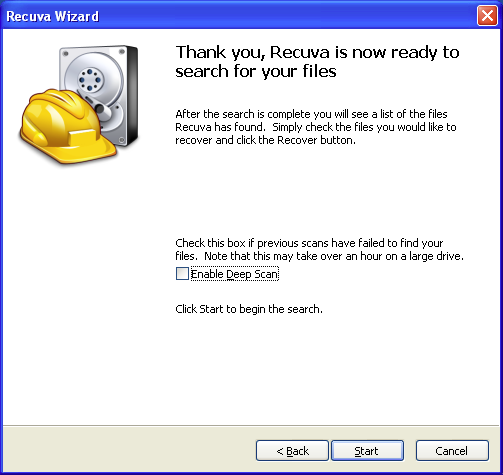
Let's stick with a non-deep scan for now. Clicking the button starts a 3-stage scanning process.
Stage 1 of 3: Scanning drive for deleted files
Stage 2 of 3: Analyzing damage
Stage 3 of 3: Analyzing file contents
When Stage 3 has finished, Recuva displays a window with a list of files that may or may not be recoverable.
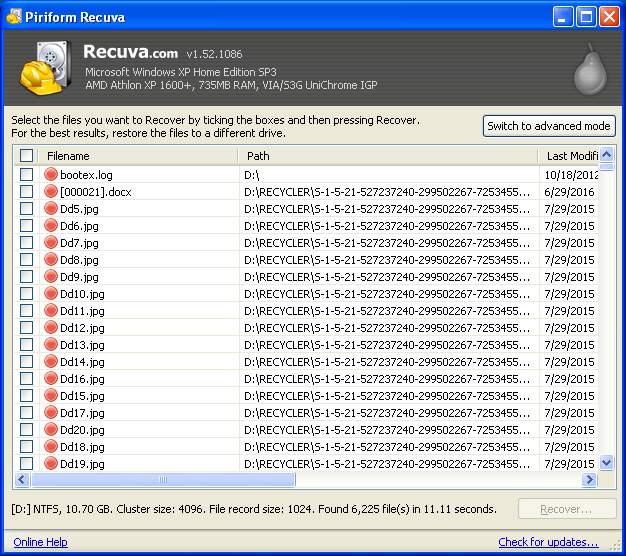
Each file name is preceded by a solid circle whose color indicates the likelihood of recovery, which is "excellent" for a ● circle, "acceptable" for a ● circle, or "unlikely" for a ● circle.
Now, a humongous list of >6000 files is not exactly a user-friendly data set; we can directorily organize the list and shed parts of it we don't want in the advanced mode, so let's switch to the advanced mode by clicking the button, which gives the window below:
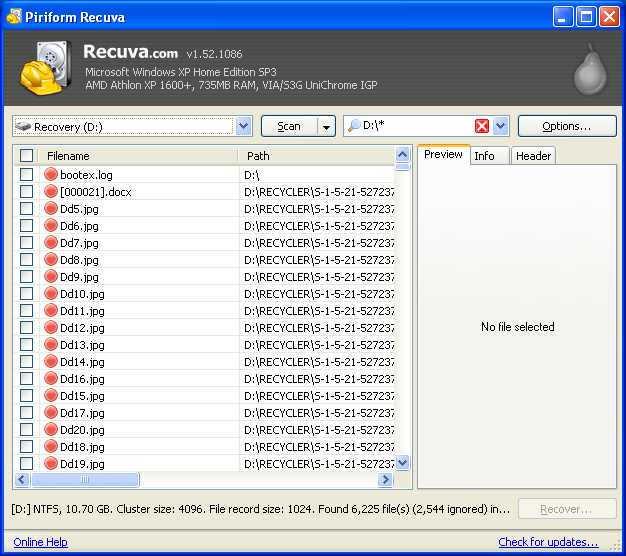
Shaking the tree
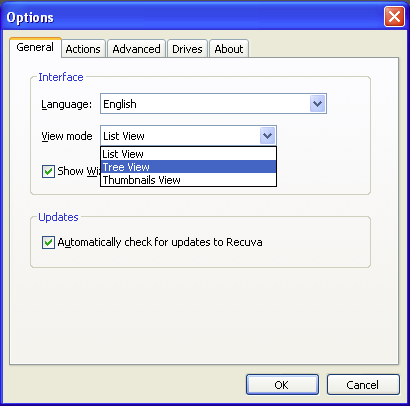
By default, Recuva outputs a list view display for its search results; you can switch the display to a volume- and directory-organized tree view by clicking the button and then selecting the Tree View option in the View mode menu on the General tab of the Options window that pops up:
Clicking the button gives a display window with a single
⊞ D:\
result, whose expansion returns:
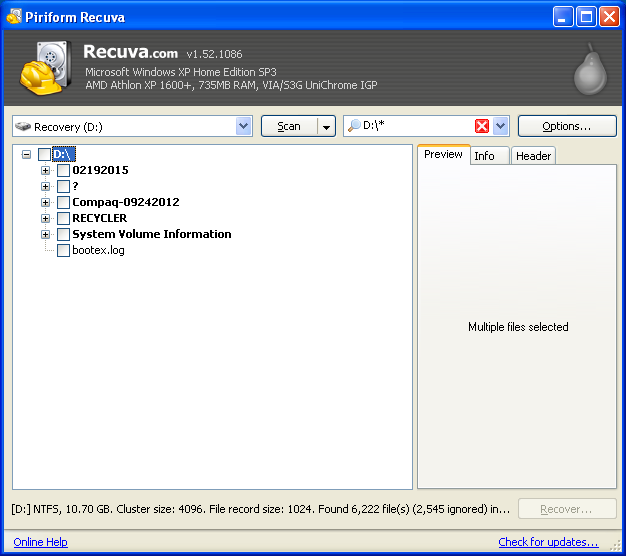
My menu is like a sieve
Between the button-menu and the button, the advanced-mode display window features a text input-menu via which the search results can be filtered by file type.
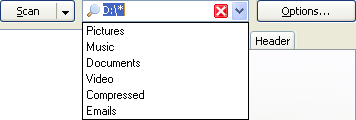
The Pictures, Music, Documents, Video, Compressed, and Emails file categories are defined for the wizard mode here; I'm pretty sure (but not 100% sure) that these definitions also apply to an advanced-mode non-deep scan.
Moreover, we can enter an *.ext1|*.ext2... expression into the input to zero in on files with specific extensions: à la the syntax of regular expressions, * matches zero or more file name characters and | serves as a boolean OR operator; for example, we can isolate the results' .wps, .jpg, and .pdf files by typing *.wps|*.jpg|*.pdf in the input.
Hmmm, ten screenshots, that's enough for one post, wouldn't you say? We'll continue our Recuva conversation in the following entry.
No comments:
Post a Comment